|
I'm desperate. I updated to mac High Sierra 10.13. Buy microsoft office 2011 for mac -2016. 2 and my MySQL wouldn't start on my MAMP: So I deleted the ib_logfileN:s, typed sudo killall mysqld in terminal and restarted. I'm desperate. I updated to mac High Sierra 10.13.2 and my MySQL wouldn't start on my MAMP: So I deleted the ib_logfileN:s, typed sudo killall mysqld in terminal and restarted MAMP(that usually works) but it didn't. So in the end I had to uninstall MAMP and download it again - and it worked the first time, but when I restarted it, same problem. So I uninstalled MAMP - downloaded AMPPS - and the same problem appeared there. So uninstalled AMPPS and downloaded XAMPP, and the same problem appeared there:. Obviously there is something wrong with my MySQL Server that I cant figure out, i want to murder my computer. Any help or guideance would be greatly appreciated In the end I had to uninstall mysql with homebrew, and reinstall it according to:. It has worked after that. 
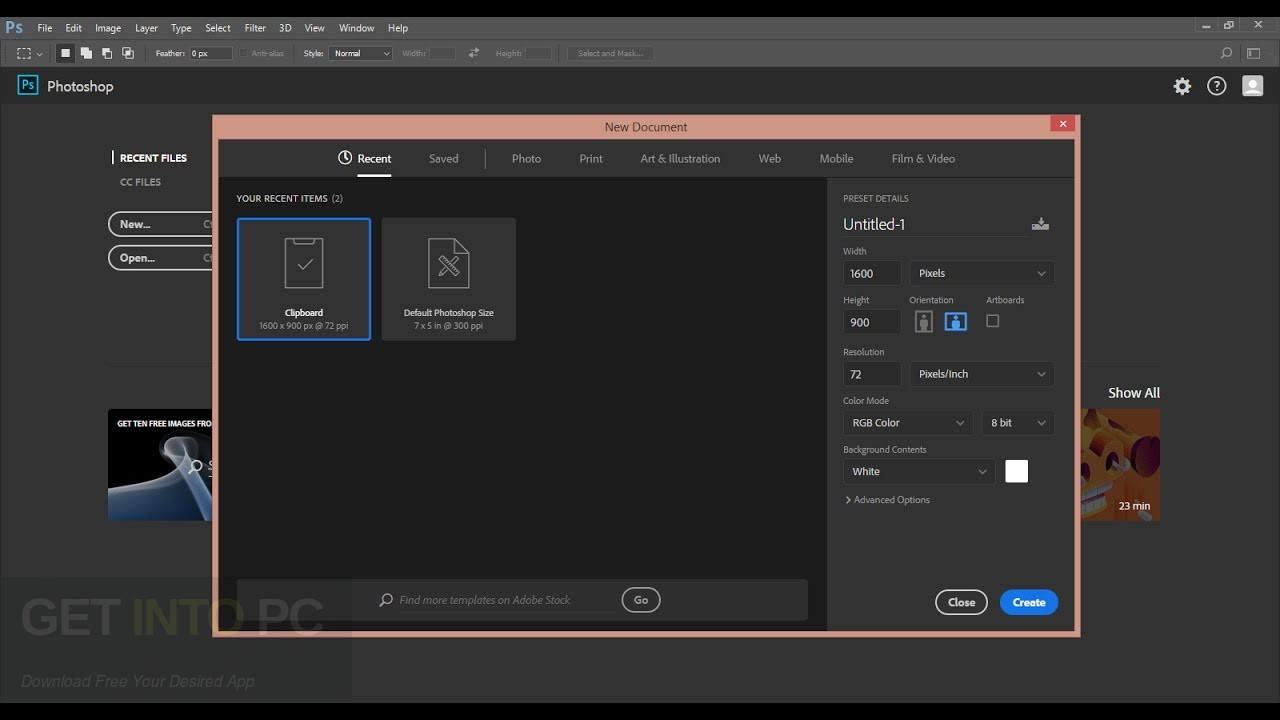
Hello Mac User! This Tutorial Shows You Step-by-Step Hadoop Installation on Mac High Sierra 10.13 OS X. Especially relevant: this is a Vanilla Hadoop Install on Mac High Sierra in Pseudo-Distributed mode. Because Hadoop is a distributed master-slave that consists of the Hadoop Distributed File System ( HDFS) for storage and Map-Reduce for computational capabilities. Furthermore the Guide Describe a System-Wide Installation with Root Privileges but You Can Easily Convert the Procedure to a Local One. Finally Apache Hadoop Require a Java JDK 7+ Setup on System. So if Needed Follow the linked guide to Install Oracle JDK on Mac. In additon Apache Hadoop 2.x Includes the following Modules: • Hadoop Common: The common utilities that support the other Hadoop modules. • Hadoop Distributed File System (HDFS): A distributed file system that provides high-throughput access to application data. • Hadoop YARN: A framework for job scheduling and cluster resource management. • Hadoop MapReduce: A YARN-based system for parallel processing of large data sets. Adobe Photoshop CS5 delivers breakthrough capabilities to help you create images with impact. Refine your images with reengineered photography tools for removing noise, adding grain, and creating high dynamic range (HDR) images. Get precise results when making complex selections. Remove any image element and see the space fill in almost magically. Apache Haddop Setup on Mac High Sierra • Download Latest Apache Hadoop Stable Release.
0 Comments
• File Name: LRW.exe • Author: • License: Shareware ($199.00) • File Size: 61.95 Mb • Runs on: WinXP, WinVista, WinVista x64, Win7 x32, Win7 x64, Win8 x32, Win8 x64, Win10 x32, Win10 x64, Win2000, Mac OS X, Mac Other, Windows2000, Windows2003, WinServer, Windows Vista, Windows Tablet PC Edition 2005, Windows Media Center Edition 2005, Mac PPC, Mac OS X 10.11, Mac OS X 10.10, Mac OS X 10.9, Mac OS X 10.8, Mac OS X 10.7, Mac OS X 10.6, Mac OS X 10.5, Mac OS X 10.4, Mac OS X 10.3, Mac OS X 10.2, Mac OS X 10.1. You should use this file system if you may share the drive with Windows PCs and other devices like the PlayStation 4 and Xbox One consoles. Better reformating tool for usb on mac. ExFAT is the ideal cross-platform file system. It’s not natively supported on many Linux distributions, but you can. For external drives, it almost always makes sense to format in ExFAT, unless you’re using the drive for Time Machine. 
Video converter for mac rapidshare. Prospective buyers have several purchase considerations, including which operating system (OS) the software supports. While Windows products previously dominated the workplace, the increasing popularity of iPhones, iPads and iMacs means that more and more businesses are looking for project management software for Mac devices. This premium software from Tenantopia, Inc. Is a very popular property management software that can be used for managing all the investment properties from anywhere in the world. How to Install Rental Property Management software? Most of the rental property management software that is available online can be used as a premium version. MAC_Find: Vendor/Ethernet/Bluetooth MAC Address Lookup and Search Vendor/Ethernet/Bluetooth Lookup and Search Match your MAC address to its vendor. Match a vendor to the MAC addresses it uses. Adobe Photoshop CS5 delivers breakthrough capabilities to help you create images with impact. Refine your images with reengineered photography tools for removing noise, adding grain, and creating high dynamic range (HDR) images. Get precise results when making complex selections. Remove any image element and see the space fill in almost magically. 
MAC Address or Vendor to look for: Search by vendor. For example: 'apple' or 'allied' Search by MAC Address. For example, your HP's MAC (Media Access Control) address is a 12-digit identification number the manufacturer assigns to your network adapter. Even though this is all very technical, finding the address on your HP is a relatively quick and easy process. Improve mediatek wireless utility for mac. For example: '00:13:A9' or '00-80-C7' or '000420' If you want to lookup MAC address '08:00:69:02:01:FC':, enter first 6 characters '08:00:69', or full MAC address '08:00:69:02:01:FC'. *** We're Back! After a long database update pause, updates are back. More changes coming to the Internet's oldest on-line MAC address database in the weeks to come. *** Database last updated: July 10, 2013 See also: • • • • Send comments to jason @ coffer.com. All rights reserved. Bookmark this site: Page generated in 0.0003 seconds.. Today the internet is a backbone of every business and need of every one. Internet are two type plan one is postpaid and second is prepaid. Postpaid is standing for pay after use. Means bill will be generated as per your plan or usages basis end of the month. Feb 13, 2018 How To The Monitor The Bandwidth And Data Usage Of. Monitor Bandwidth and Data Usage on Your Router. RELATED: How to Use a Custom Firmware on Your Router and Why You Might Want To. The most accurate way to monitor this would be on your router itself. Network Monitoring Software - Graphical Network Monitor Portable, Light-weight Memory Footprint. Prepaid is standing for first pay and then use. Prepaid usages are depending on the data balance you buy for the prepaid plan. This post for use of managing and save internet data, because in this post I will share with you the best free software to monitor internet usage. After installation of internet usage monitor software in your PC you can easily watch how is the balance internet data and what is current speed and total analysis of month wise internet speed as well as getting speed as per your plan or not. Read fully to know more about best free internet usage monitor tools for your Mobile Computer and Tablet. Enjoy the free and best broadband internet bandwidth usage monitor and never let down your internet plan out of data. • Popular Post: 1. BitMeter II: Internet Usage Monitor Web-based Tools BitMeter 2 is a 100% freeware network utility to let you monitor your internet usages. BitMeter provides you feature to monitor your current internet speed, real-time data consumption, and upload download speed. It is popular bandwidth monitoring software to track Internet bandwidth usage with details graphical statics.track your monthly usage of internet and total speed. You can configure BitMeter for auto backup of data recorded by the software. And you can change data up and down the color code as per your choice. Taskbar icon available for live monitoring of speed and internet usage. You can just check the speed on hover of the mouse cursor. You can download it from official website completely free and get how to install BitMeter 2 Manual. Download Free BitMeter 2 Now for Windows Linux and IOS. Read Also: • • 2 NetWorx: a Graphical Network tools for internet monitor After BitMeter NetWorx is the Best alternate to track your internet usage as the real-time basis. Does not matter you are using broadband internet connection or Mobile hotspot in your Windows PC while Networx monitors your broadband bandwidth as well as mobile data. It is also 100% free network utility. NetworX is a lightweight network tool for monitoring all type of internet connection, NetWorx can monitor dial-up, ISDN, cable modems, ADSL, Ethernet cards, and more. NetWorx is a clear graphic and numeric display which can easily track your internet usage. Microsoft windows free download - Microsoft Office 2011, Microsoft Messenger, Microsoft Office 2008, and many more programs. Best buy microsoft windows for mac. After installing both Windows and Windows Support Software, you can switch back to macOS using the Boot Camp system tray item in Windows. Select the macOS volume, then restart your Mac. To switch from macOS to Windows, use the Startup Disk preference pane to select the Boot Camp volume, then restart your Mac. All the features of Windows 10 Home plus enterprise grade security, powerful management tools like single sign on, and enhanced productivity with remote desktop and Cortana. Licensed for 1 PC or Mac. Made with Mac in mind, Office 2016 for Mac gives you access to your favorite Office applications - anywhere, anytime and with anyone. Includes new versions of Word, Excel, PowerPoint, Outlook, and OneNote. See what's new in Office 2016. Your school may offer Office 2016 for Mac for free. Search for your school below to claim this academic deal. NetWorx helps you to generate your monthly report of internet usage, its help to detect and any time network issue and speed consumption limit cross to avoid charges of the internet. Download NetWorx from official website free of cost. Networx supports Windows, Linux, and macOs platform.  
You can get the premium version of Networx to get an extra feature for your. • • NetStat Live: Fest Free Internet Usage Monitor Tools Using The best broadband internet bandwidth usage monitor will always alert you about over internet usage on your network and Windows PC. Netstat Live is another good network utility to monitor your internet usage as well as track your monthly reports.NetStat Live show total usage of incoming and outgoing total data stat. Currently NetstatLive available for windows all version, you can download it directly from official website free of cost. Netstat Live tool is one of the best free internet usage monitor tools for your internet data plan. It does not consume any data to self-usage and give you a managed network traffic control and monitoring tool to avoid losing data and overcharges. You can change color and size as per your choice. Broadband Usage Meter very user-friendly to configure and easy to monitor. Download from the official website and get the complete user manual with configuration steps.  
CONTENTS • 1. How to set up g suite email in outlook for mac. Top 6 Free DVD Burners for Mac 1. Backup your DVD movies by using a free DVD ripper to extract video files to be viewed on a PC or mobile device. For extracting video files to view in iTunes or another player or to backup a DVD you will need DVD ripping software. There are a number of free DVD ripper programs available to assist. An Extraordinary DVD Experience Anywhere. As the best DVD ripping software, Pavtube DVDAid for Mac offers Mac users the efficient way to copy disc with 1:1 DVD structure and save to computer hard drive without quality loss. ITunes I think, most of you have iTunes running on Mac as the default media player. Actually, serving as a free DVD burner is its another powerful role that you may not notice. The DVD burning operation is easy. First, create a new playlist and then drag your desired media such as iTunes Radio, TV shows, movies and music to the newly-established playlist. (Considering iTunes supports batch task, burning a whole well-selected playlist to DVD will save you much effort, rather than repeating the DVD burning one by one). Then control-click on the playlist and select 'Burn Playlist to Disc' function. After that, you will manage to burn media to DVD on Mac. Burn Seemingly as its name suggests, works as a reliable Mac free DVD burner catering to your need. Once launching the software, you will encounter a succinct interface directly telling you a burning division of four modes: Data, Audio, Video, and Copy. Here, you are allowed to not only burn the data, audio, and video to DVD but also copy other DVD files (.dmg, iso, cue/bin, etc.) to DVD. Disco At the sight of and clear is part of its feature. The Mac DVD burner simply acts on dragging the media files to the program. What's more, it has a nose for the file on your self-burned disc, a quick fix for file arrangement. An addition of 3D animated smoke will perfume the final product with the amusing atmosphere. You can still find access to this free DVD burner software for mac, yet it has been officially discontinued since July 2011. Simply Burns is also a great choice to burn DVD on Mac. The DVD burner shares a detailed but clear elaboration on classifying diverse burning functions. First, you can have a general look at the DVD info. Surprisingly, image burning is part of it besides basic video/audio/data process. You can also set the burning speed and choose 'Leave Disc Appendable' to keep tracks of the burned DVD. Finder Unexpected news strikes that there hides a built-in tool to do the DVD burning. Finder is a default file manager that you can find on all Mac operating systems. Slice tool. To apply strikethrough formatting: Cmd + Shift + X 4. That means you can spare room occupied by the third party software. It helps to locate the media file easily which will then be highlighted in the right column. Then you find Burn to Disc option and directly click it. The selected file will then be burned to DVD smoothly. But Finder itself has admitted that it only works as free DVD burner for data. FirestarterFX It's interesting that shows up in a design of disc shape as if you are touching the disc to add the items and make some transformation. It has been divided into 5 parts: Home, Copy, Image, Data, and Erase. A general reading on the Home page is a due preparatory work. As such, you get informed that the DVD burning materials can be backup copies of other discs, cue/bin, ISO images, and data. Also, erasing the unwanted part on the DVD is workable quickly. Upload unlimited photos and up to 35 hours of video, 2 then create and share from anywhere using the GoPro app. TRY IT FREE Cancel anytime. Terms + conditions apply. 1 QuikStories requires a HERO7, HERO6, HERO5 or HERO camera and the GoPro and Quik mobile apps. GoPro VR Player is a 360-degree video and photo player for the desktop computers. It is available both for the PC and Mac. Using this media player, you can watch 360° videos locally with some of the professional playback features found only in high end video players. It is not just another ordinary video player, it is specifically designed to play the 360° videos created using Sony GoPro action cameras. You can use this software along with some of the popular VR headsets to watch the videos. It can work with Oculus Rift VR headset as well as HTC Vive VR headset. GoPro VR Player comes in a large download package but is actually a lightweight and fast video player. It is able to play the lightweight, yet powerful player that lets you enjoy 360° videos on your computer just as would play any other videos. It gives all the different controls using which you can watch the 360° videos on your PC or Mac. When you open the GoPro VR media player, you are shown a window where you can import a supported spherical video by either dragging it and dropping it on the main window or by selecting the video files from your local storage manually by clicking on the Select Files button. As the video starts to play, you will be able to find the video playback controls like usual. If you have configuard the VR headsets to work with your system, then you can simple put on your VR headset and watch the video using it. Conclusion: GoPro VR Player is an ideal choice if you want to play the 360° spherical videos on your PC or Mac. 
It works very well with Oculus Rift and HTC Vive virtual reality headsets. It is free software that can make watching 360° videos on your computers more fun. You can download GoPro VR Player from. 
The entire disk space is taken away by the apps you have installed, the files you have stored and of course its OS also has a share of it. But these are not the real culprits. If there’s anything you can blame it on, then its duplicates, cache files, unused apps and many more files like this. Worry not, we have listed top 10 Mac optimization apps for your help. These are the best mac cleaning software that will allow you to remove all unwanted apps and files in no time. 10 Best Mac Cleaner and Optimizer 1. Disk Clean Pro: This is the best Mac cleaning software. It lets users clean out clutter on their Mac in a jiffy. Other storage space is usually the deep files and folders that occupy your disk storage spaces. Do read this KB article – How to clean other spaces on Mac. Hope this helps. With its various scanning alternatives, you can scan your Mac for specific files. Power eraser for mac. Let’s say, its One Click Cleaning ensures that all cache, unwanted log, trash files and unfinished downloads are removed in a click. Likewise, it also has scanning options for optimization, and specific manual cleaning. The app is rated with 4.5 stars on Apple App Store by happy users. DaisyDisk: Developed by Software Ambience Corp., DaisyDisk is an app that shows up scanning results in pie chart. Upon launching, the app asks you to select a disk and scans it. It also gives you a clear disk usage figures when clicked on specific colors. Further, the app come up with files that are occupying this space and you can delete these files from there. Read Also: 3. Disk Inventory X: This is another disk cleaning software for Mac. It scans the disk to figure out its usage and shows it up in treemap format which is also indicated with different colors. Users can click on each section and preview all files in each folder, prior to deleting them. Read Also: 4. CleanMyMac 3: CleanMyMac 3 is a later version of CleanMyMac app, developed by MacPaw. Upon launching, you need to scan the disk with this Mac cleaning software. It then comes up with results in different categories like System Junk, iPhoto Junk, iTunes Junk, Trash and more. Once you have previewed your files in each section, you can proceed to delete all unwanted ones. Cleaner app sorts the disk usage results in categories and sub-categories, after it has been scanned. Like others, this software also let you preview your files and delete them afterwards. MacCleanse: Developed by Koingo Software, Inc., MacCleanse is comprehensive software. It scans your disk thoroughly and lists it results in various categories. 
The software’s Cleanup chiefly focus on Cache, Logs, Recent Files, Blacklists, Trash, Web and Others. Along with this, it also tells the estimated total usage of disk for better cleaning. Also Read: 7. CCleaner: This Mac optimizer is available in three versions, namely free, professional and professional plus. Successively each version adds up more features for users to analyze their disk usage. For anyone who is looking for free version, the app will only fasten your Mac and protect privacy. Now Windows users can also Download and Install OS X 10.10.x Yosemite Hackintosh on Windows PCs / Laptops as Dual Boot to experience full features and functionalities of Mac OS X Yosemite 10.10 on Intel and AMD based Windows. The Direct Download Link of Hackintosh OS X Yosemite 10.10.1 is available below. I'm trying to install Mac OS X on my Dell Optiplex 380 PC.every time I boot the installer it shows me this. My motherboard only supports IDE and no option to AHCI but I managed to put IDE Compatible IOATAFAMILY.kext in the USB using Ubuntu. I think there is no problem with IDE since I was able to boot to leopard snow leopard and lion. Advertisements iHackintosh guide to install OS X Mountain Lion 10.8 in a virtual machine with VMware, Windows 7 host. After spending hundred’s of man hour poking around the “Hackintosh” community and overcome a few quirks along the way, I have successfully installed Mac OS X Lion 10.8 on my Windows 7 Ultimate, VMware 8 workstation. Following are the instructions to install OS X 10.8 Mountain Lion in a virtual machine with VMware. Although, the process of making your own Hackintosh from scratch has become easier, there are still many things you need to pay attention, especially for a beginner. I recommend you to go through the whole article twice or thrice. ————————————————————————————————————————————————— Note: If you like our work, encourage us by sharing this post on Twitter, Facebook, Google + as much as you can. ————————————————————————————————————————————————— ————————————————————————————————————————————————— Note: Note: Note: We need a bootable Mountain Lion.vmdk to install OS X with VMware. 
If you don’t know how to create bootable.vmdk, follow our previous Requirements: • Core 2 Duo Processors ( i5, i7 processors are more preferable). • Minimum 4 GB RAM. • Minimum 40 GB Hard-drive space. • A retail copy of Mac OS X Mountain Lion operating system. • Mountain Lion bootable.vmdk () Downloads: •. @Mark Randal I, too, experienced that problem. My suspicion is that you (like I) have an IDE CD/DVD “drive” in VMWare (based on the hardware of you HOST OS [mine is a Dell790]) Anyway, the SOLUTION is: 1) Follow the procedures to create a BOOTABLE.ISO file (that lives on your PC [the HOST OS]). 2) Edit your Virtual Machine settings, to point your CD/DVD to that.ISO 3) EXIT from VMWare. 4) Modify the.vmx of the Virtual Machine you’re creating, and change ALL “ide0:0” to “scsi0:1” (you might want to make a backup of the.vmx so you can restore it after you’ve created your working Guest OS) 5) Start your Virtual Machine, and Voila It boots AND INSTALLS! As I understand it, the MAC Installer is looking for SCSI devices ONLY – and the IDE CD/DVD drive is, basically, IGNORED by the installer. By creating a bootable.ISO, and faking VMWare into constructing a “pseudo-SCSI CD/DVD” device (albeit pointing to the.ISO), the Installer is now happily seeing the “CD” as a SCSI device, and all is well with the world! I keep getting the same error messages in step 5 and The virtual machine never starts. First I get a window stating: “Software virtualization is incompatible with long mode on this platform. Disabling long mode. Without long mode support, the virtual machine will not be able to run 64 bit code” After accepting the first window I get a second message: “Mac OS X is not supported with software virtualization. To run Mac OS X you need a host on which VMware Workstation supports hardware virtualization” I’m new with virtual machines and Mac’s, my platfor is Windows 7 on intel (T5550). Power eraser for mac. Will really appreciate any help to get this working. PD: I have already applied the VMWare unlocker and it seems to run Ok. Followed instructions with no luck. Here is what I did instead. Made an ISO of the 10.6 install disk, and installed that in VMWare. (10.6 doesn’t require any special processing, just boot and install). Then I updated that to 10.6.8 via the built-in software update. Then I copied over (downloaded) the normal OS X 10.8 installer (from the App Store). Xero's wealth of features and attractive and intuitive user interface have made it very popular with users. Xero Website Xero is a cloud-based accounting solution from a company headquartered in New Zealand. It is a comprehensive accounting package that is targeted towards small to medium-sized businesses (). Payroll is an expensive addition to the desktop versions. Software for small retail business. Visit the for more info including. Ran that, let it install. After the install the OS will take a LONG time to boot. 
30 min – 1 hr. Once it booted I used KextBeast to install the FakeSMC.Kext. Now the OS boots much faster, although there seems to be like a 10 minute delay after rebooting before mouse and keyboard will work in the virtual machine. Suspending and un-suspending do not have this problem. So far this seems to be the most solid way I have found to install the OS and get it to the point that it is usable. Hello, I followed all instructions and everything worked as you said. However, I copied the FakeSMC.Kext into the system/library/extensions directly like you mentioned in the 1st post, but when i reboot to load Mountain Lion, I get the apple screen with the spinning wheel for a couple of hours with no completion of the installation. I don’t know if it is hung or stuck, but it want boot into Mountain Lion to complete the install. I powered down the VM and started up again with the same results. Iknow that you said it could take 30 min to 2hrs on first boot, but if it does not boot in a few hours, you can’t install KextBeast and I already copied the FakeSMC.kext file directly into the extensions directory. Do you have any suggestions to get the installation to complete the Mountain Lion install after the initial installation based on you guide? A couple of things: 1) The small vmx file needs to be upgraded to VMWare Workstation 8 in order to attach the vmdx disk made in the previous tutorial (assuming that vmdx disk was made in Workstation 8, of course). 2) Several places in this tutorial you mention or show screen shots with Mac OS X Lion rather than Mountain Lion – that might confuse people.  
You're roaming through the beautiful landscape of The Legend of Zelda: Breath of the Wild and you come across a breath-taking scene what are you going to do? Take a screenshot of course! Whether you take screen captures of your progress, cool game visuals, or even just to save an image for later, it's a great way to share some of your favorite in-game memories. I'll show you how to take all the screenshots you want and even how to manage them in your photo album on the Nintendo Switch menu; let's get started! • • • • • • • • • How to record and edit video gameplay on Nintendo Switch As of OS version 4.0 on Nintendo Switch, you can also record, edit, and share video gameplay in some games. For now, it's only a few, but Nintendo promises that video gameplay recording will be supported on many more games in the future. How to take a screenshot on Nintendo Switch with the Joy-Con Controllers The Nintendo Switch Joy-Con controllers have a dedicated screenshot button, which makes capturing a screenshot a one step process. The square button is located on the left Joy-Con and it's the closest to the bottom of the controller (see picture below). Excel for mac 2016 conditional format unless correct answer is input. How to View Minecraft Screenshots on a Macbook. Are you a huge Minecraft. Set Finder to a different view to see the screenshots folder. To do so, go up to the. Minecraft Java Edition (PC/Mac) Minecraft Java Edition (PC/Mac) is a version of the game that runs on a PC or Mac computer. Therefore, you would use your. Once you have pressed the button, you'll hear a camera shutter sound, and a notification in the top left corner of your screen will say 'Capture Taken'. How to take a screenshot on Nintendo Switch with the Pro Controller If you're a fan of the slightly larger and more conventional Pro Controller, you can still take screenshots by pressing one button. The square button is located just left of center on the Pro Controller right above the directional pad and underneath the '-' button (see picture below). Just like with the Joy-Con Controllers, you'll hear a camera shutter sound and see the 'Capture Taken' notification in the top left corner of the screen. How to view your screenshots and videos on Nintendo Switch All of your screenshots, whether they are saved to the system memory or a microSD card can all be found in the Album in the switch menu. • Navigate to the Album button on your Home screen. • Press the A button to open. Here all your screenshots will be displayed. How to filter your Album by videos or screenshots only Now that you have two different types of media in your Album folder, you can filter the types to make it easier to find what you're looking for. • Select the Album button on your Home screen on Nintendo Switch. • Select Filter or press the Y button. • Select which filter you want to use. You can filter media types by the following: • Screenshots Only • Videos Only • System Memory • microSD Card • Media from a specific game • Other (like system screenshots) If you want to start your search over, you can clear the filter by selecting Clear Filter or pressing the B button. How to copy a screenshot or video to a microSD card on Nintendo Switch If you have a screenshot that was saved to your system memory that you would like to copy onto your microSD card, you can do so in the Album menu. • Navigate to the Album button on your Home screen. • Press the A button to open. • Select the screenshot or videoyou want to copy. • Press the A button to get to the Editing and Posting menu. • Select Copy • Select Copy again. You'll now have two copies of that particular screenshot or video — one on your system memory and one on your microSD card. How to copy all screenshots and videos to a microSD card on Nintendo Switch If you want to transfer all your screenshots from your system memory to your microSD card, you don't have to do it all one at a time! Hallelujah, you can do the all at once in the system settings! Xero's wealth of features and attractive and intuitive user interface have made it very popular with users. Xero Website Xero is a cloud-based accounting solution from a company headquartered in New Zealand. It is a comprehensive accounting package that is targeted towards small to medium-sized businesses (). Payroll is an expensive addition to the desktop versions. Software for small retail business. Visit the for more info including. • Navigate to the System Settings button on your Home screen. • Press the A button to open. • Select Data Management from the menu. • Select Manage Save Data/Screenshots and Videos. • Select Manage Screenshots and Videos. • Select System Memory. • Select Copy All Screenshots and Videos to microSD Card. How to delete screenshots and videos on Nintendo Switch Once you don't need a screenshot or video anymore, you can delete them at any time. Make unique creations and show off your photos in customized cards, scrapbook pages, calendars and photobooks. Adobe photoshop for mac waltmart. But you can open HFSExplorer, read a Mac-formatted drive, and copy the files to your Windows PC without paying a dime. It can also mount Mac.dmg disk images to get at the files inside them. This application’s read-only nature isn’t necessarily a bad thing. Mac drive reader free download - Remote Drive Pro for Mac, Kinoni Barcode Reader - Wireless Barcode Scanner for PC and Mac, Wifi Drive Pro - Transfer Files from PC or Mac through Wifi, and many. One option is to back up your old Windows external drive (using ). Reformat the drive using Apple's Disk Utility software and the company's HFS+ file system instead. Then you can restore the backed up data to the drive. Even if the backed up and restored files originally came from a PC, they'll be stored on the drive using a file system the Mac fully understands. That way the drive will be fully Mac-compatible without any need for you to modify the operating system of the Mac to get it to work properly. Obviously that solution doesn't work for everyone. Maybe the drive you're using has to be used with a PC occasionally. Whatever the case, the good news is that it's not a show-stopper: There are a few utilities out there that will enable Macs to write to mounted NTFS volumes. Tuxera's is one of the best ways to do it. It uses smart caching to keep data transfer as fast as possible and works with every OS X version since 10.4 (Tiger). Be sure you're tabbed into the new section and go to File> Page Setup. Change the page orientation to landscape. Posted:, 06:15 PM Hi Bijan, Insert a 'Section Break (Next page)' where you want the landscape page to begin. Be sure the Apply To box is set to This Section before clicking Page Setup and making the change. How to change document orientation in word for mac 2018. You can do the same thing from Format> Document. NTFS for Mac costs $31, and you can download a demo first to see how it does. Paragon Software's is another excellent choice. It includes several additional utilities for people who need to tinker or repair, to enable you to format drives with NTFS, check NTFS partition integrity, fix errors, and more. NTFS for Mac costs $19.95. If you're a DIYer and you'd like to go the free route, you'll find a Sourceforge project called that gets the job done. NativeNTFS isn't for rookies: It's a bash script that needs to run from the Terminal command line and requires you to have root (administrator) access to your computer. An easier way to go is to download, a third-party software tool that extends the Mac's file system capabilities. Follow the directions on the OS X Fuse website to download and configure the software. Follow the instructions to download, whose development seems stopped right now but still works in Yosemite. Once OS X Fuse and NTFS-3G are installed, your Mac should be able to read and write to NTFS disks just fine. 
MacDrive is the industry standard solution for any Windows user who needs to share files between Mac and PC. With a simple attractive interface and increased speed and power, MacDrive allows Windows users to effortlessly open, edit and save files from Mac-formatted disks and burn Mac CDs and DVDs. It also allows users to create new disks, partition and repair damaged ones directly on their PC. MacDrive recognises all Mac formats including HFS/HFS+, GPT, APM and MBR. When using either VMware Fusion or Parallels Desktop software to run a virtual environment on the Mac, MacDrive ensures continued access to Mac-formatted external drives (i.e. USB, Firewire). |
AuthorWrite something about yourself. No need to be fancy, just an overview. ArchivesCategories |
 RSS Feed
